How to deploy to Azure Blob Storage
Introduction#
The whole Azure cloud is built on the Azure Blob Storage as a building block. You won't get a more reliable, more resilient, and more cost-effective way for the new origin for your static site artifacts on Azure cloud.
Azure Blob Storage also comes with the built-in Static website feature, which makes deploying a Jamstack site a breeze. Learn more about Static website hosting in Azure here.
Especially since the Azure Static Web Apps is still in Preview at the time of writing this tutorial, this should be the primary option if Azure is the only platform you are able to use at the moment.
Pre-requisites#
- Your app is running and handling static export to your file system, in other words, you completed the Getting Started section.
- Download AzCopy tool and unzip the
azcopy.exesomewhere next to your app, we will need the path to this exe in this tutorial. - Azure account with a subscription and ability to provision a new Storage Account.
Step 1. Create an Azure Blob Storage using your subscription#
Step 1.1: Provision a new Storage Account#
Option 1: Using Azure Portal#
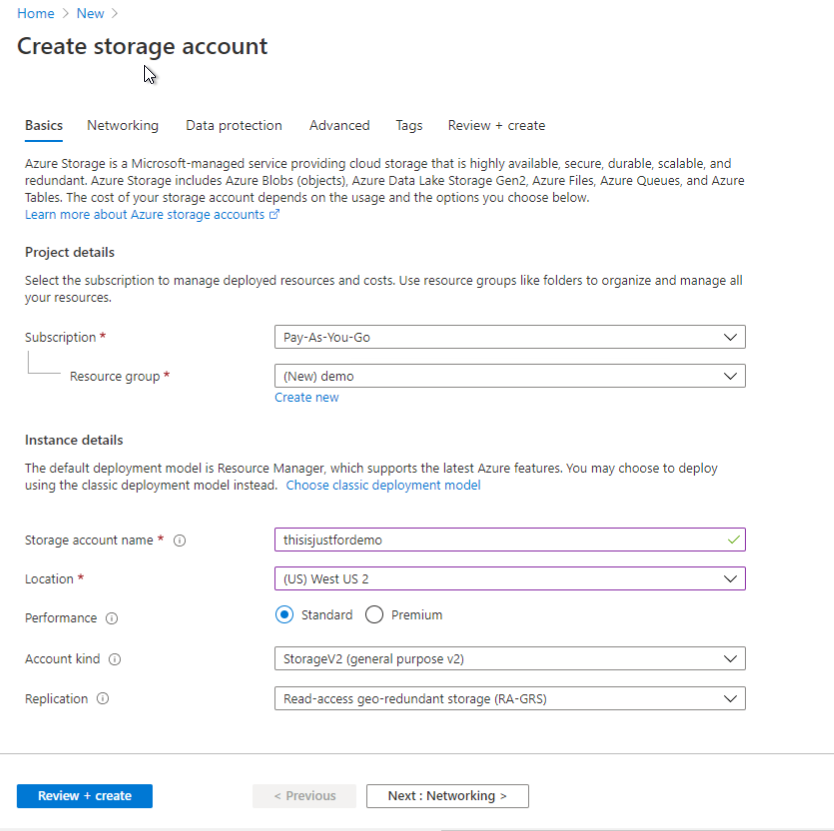
- Create a new storage account in Azure portal
- Pick new or existing Resource Group
- Pick a Location (up to you, the closest to where the Next.js app is running, the better).
- Pick Performance - select "Standard", this is important.
- Account kind - select "StorageV2 (general purpose v2)" - this is important.
- Replication - keep the default "Read-access geo-redundant storage".
- Hit "Review + create" button, then "Create"
Option 2: programmatically via Azure CLI#
Follow this official Microsoft docs to provision a new Storage account.
It is important to use the following parameter when creating a Storage Account, keep the rest to default, or change depending on your requirements.
-SkuName- use "Standard_LRS"
Skip the step when we create a container, we will do it after.
Step 1.2: Configure your storage container#
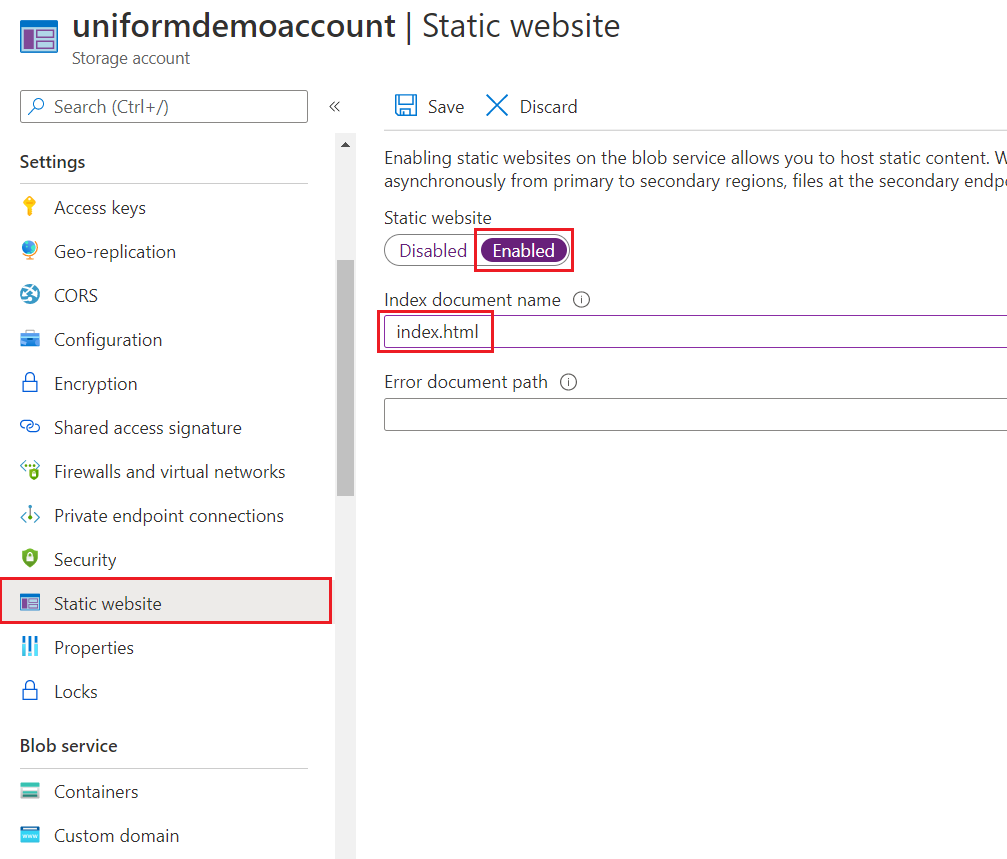
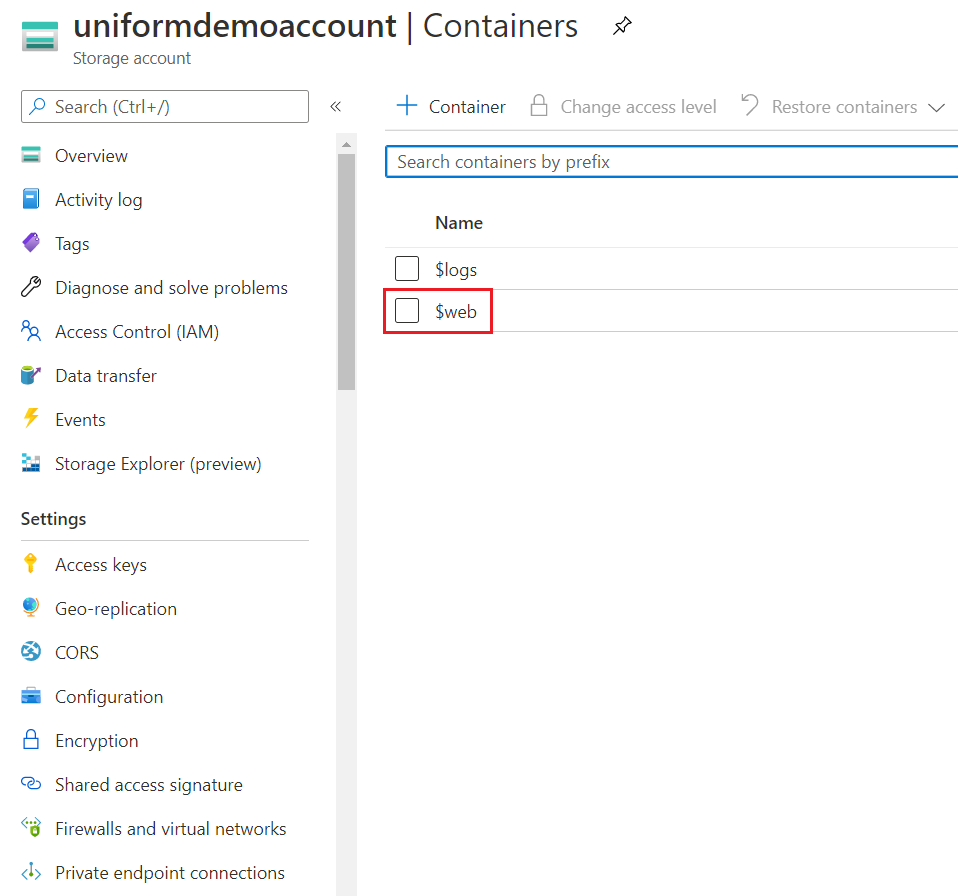
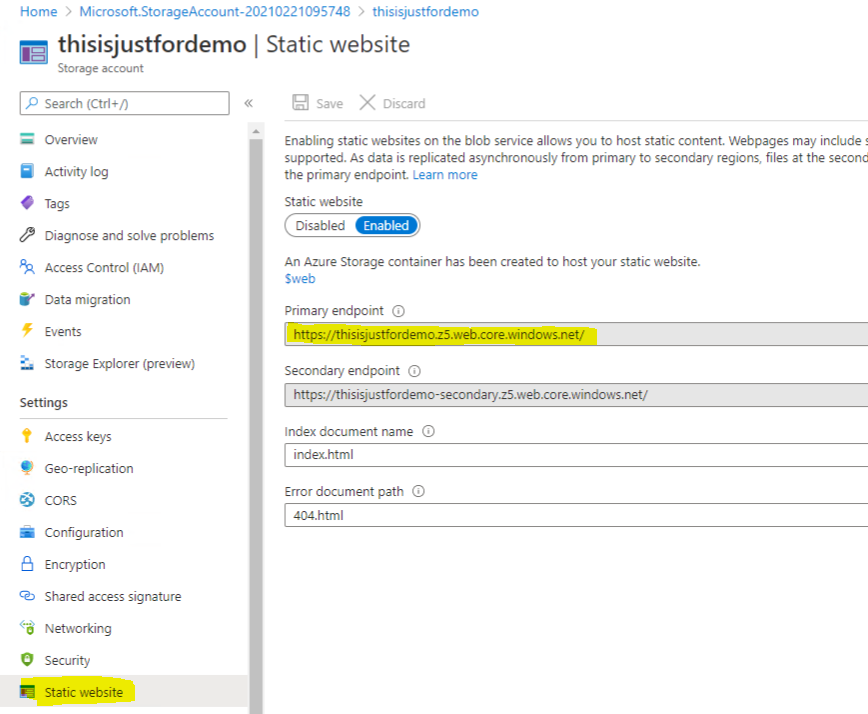
Step 1.2.1: Enable Static website feature#
When you enable the Static website feature of your Azure storage account, the $web storage container is created automatically as a result. It will be used as the new origin for the statically exported Sitecore site.
Option 1: Using Azure Portal#
Follow this official Microsoft docs to enable static website hosting feature.
- Index document name - put index.html
- Error document path - put 404.html
Option 2: Using Azure CLI#
Follow this official Microsoft docs to enable static website hosting feature.
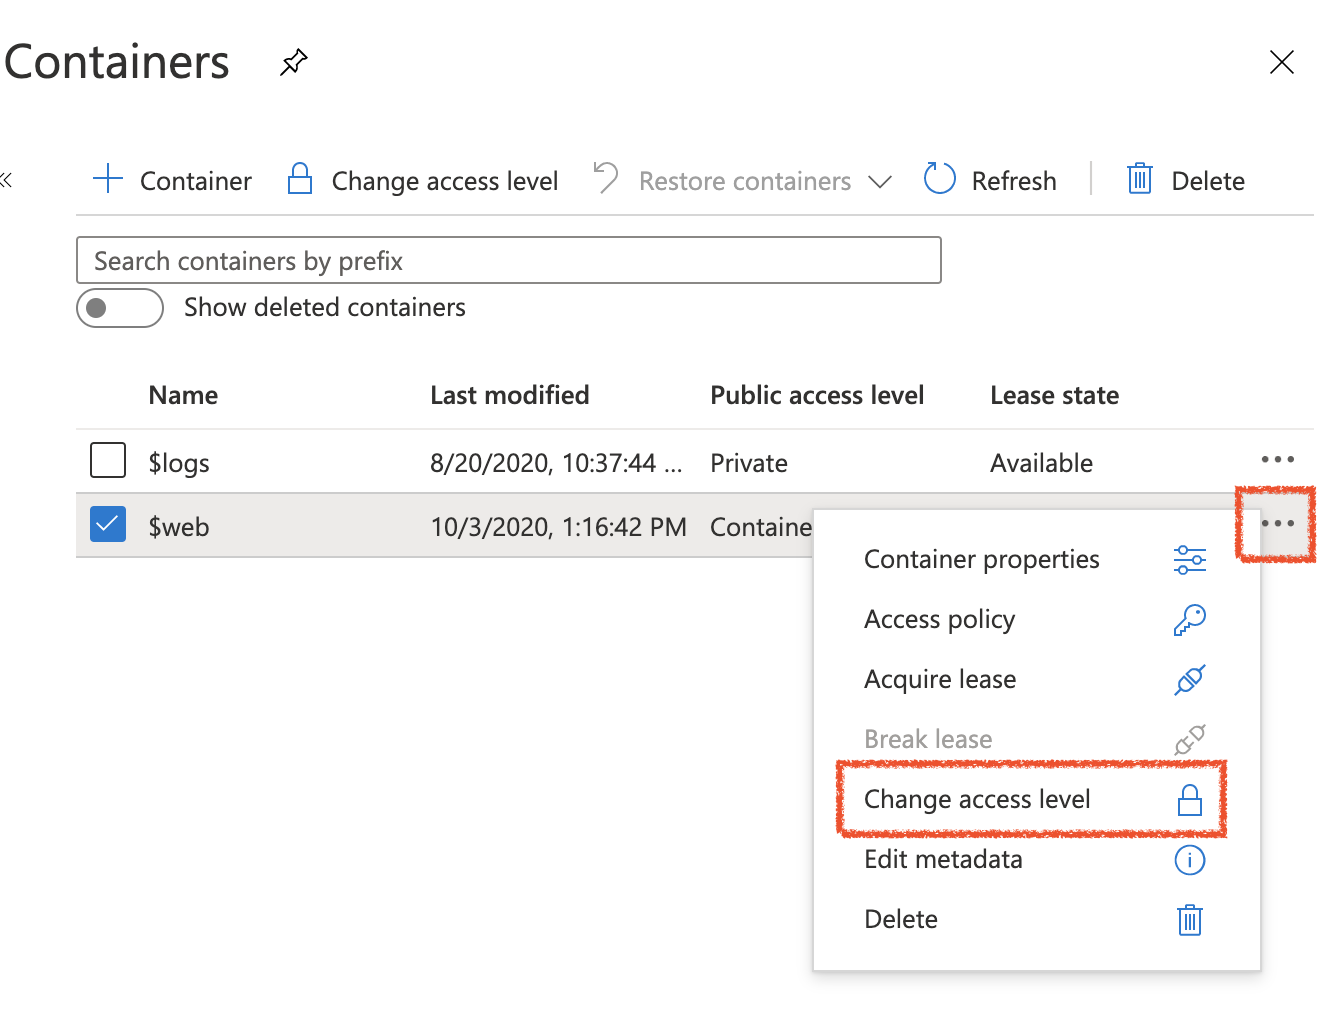
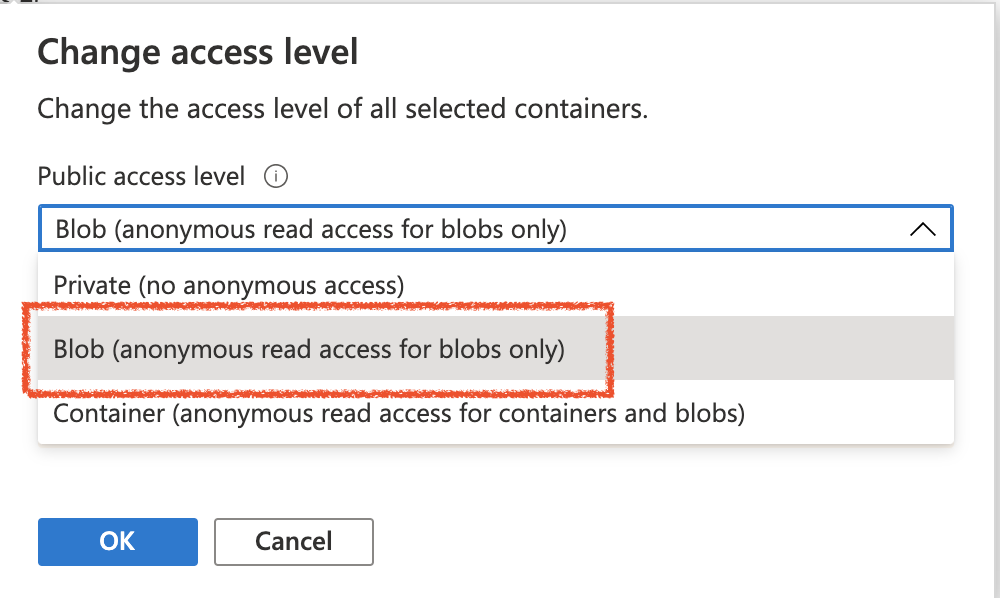
Step 1.2.2: Set container permissions#
Allow public read access for anonymous user to a blob storage of the $web container:
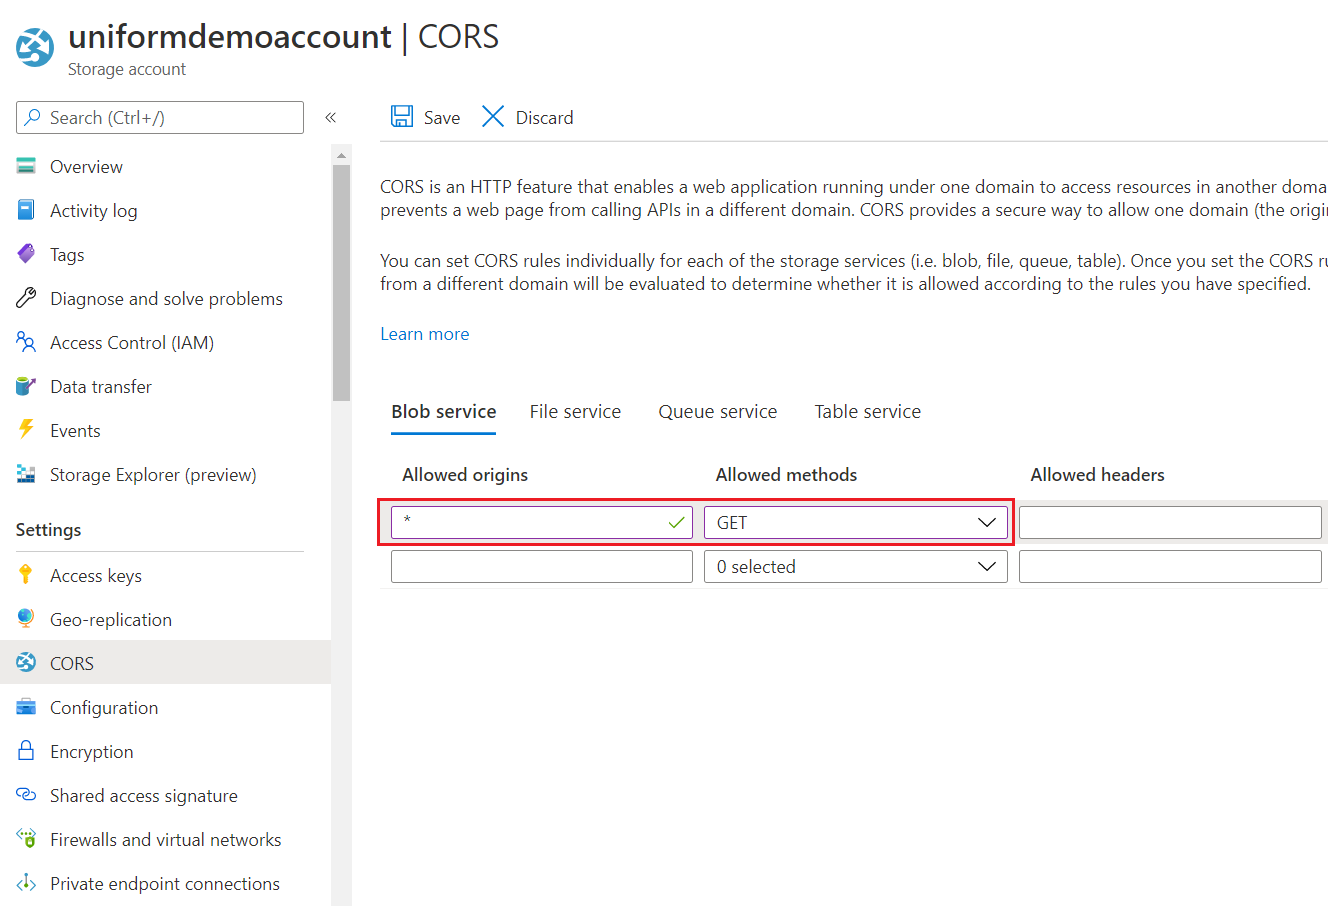
Step 1.2.3: Enable CORS for all GET methods:#
Step 2: Configure your app#
Step 2.1: Extract your Storage account connection details#
Fill the following additional environment variables into the .env file that is located in the root of your NextJs starter kit:
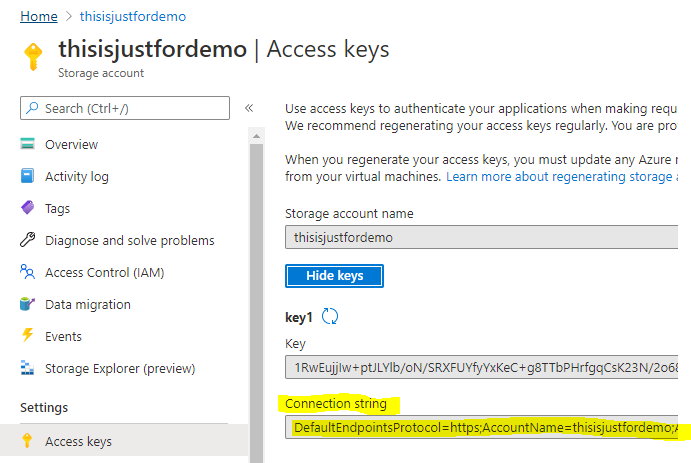
Option 1 (recommended) - extract connection string#
The Connection string value will go into the AZURE_STORAGE_CONNECTION_STRING
Grab it from the Access keys tab of your storage account:
Option 2 - extract storage account name and storage access key#
If for some reason you don't want to go with the Connection string approach, there is an alternative.
- For the
AZURE_STORAGE_ACCOUNT, we need the value of Storage account name from the Access keys tab of your storage account.
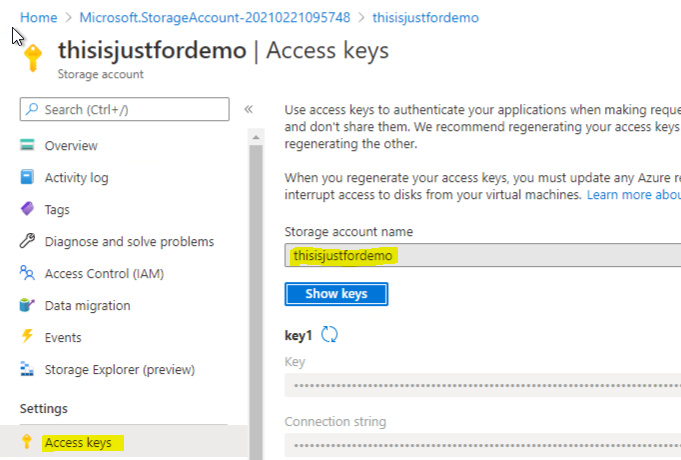
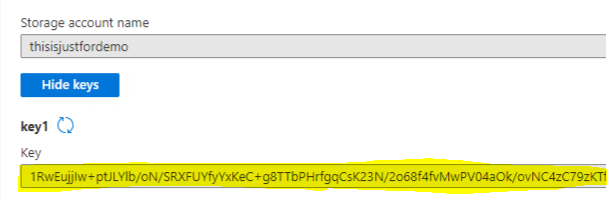
AZURE_STORAGE_ACCESS_KEYThis is the value of 'Key' from the Access keys tab of your storage account. On the same screen, hit "Show keys" and copy the value of key1 Key:
Step 2.2: extract azure blob public URL#
This value will be used to explore the result of deployment and (optional) to enable <deploymentStateService /> if configuring the incremental deployment feature. Grab the value of the Primary endpoint of your Storage account that is enabled with Static website feature. See the Static website tab:
Step 2.3: Configure environment variables#
Option 1: use .env file in your app#
This is the quickest way and it's ok for the sandbox environments. We recommend option 2 for production environments.
The additions to your .env file could look like this:
# you can AZURE_STORAGE_CONNECTION_STRINGAZURE_STORAGE_CONNECTION_STRING=DefaultEndpointsProtocol=https;AccountName=thisisjustfordemo;...
# OR use a pair of AZURE_STORAGE_ACCOUNT and AZURE_STORAGE_ACCESS_KEYAZURE_STORAGE_ACCOUNT=thisisjustfordemoAZURE_STORAGE_ACCESS_KEY=xndvfvKZFD...a_lot_of_symbols...Wia6CA==
# these are fixed values for Azure Blob Storage targetUNIFORM_PUBLISH_TARGET=azureblobAZURE_CONTAINER=$webAZURE_CONTAINER- the value of this env var should always be$webUNIFORM_PUBLISH_TARGET- the value of this env var should always beazureblobwhen you are deploying to Azure
Instead of defining these values in local .env file, you can always set these as system environment variables.
Option 2: use Sitecore configuration (recommended)#
In order to facilitate the reusability of the instance of the Build Service across different sites, which may require different target Azure Blob storage account settings, we recommend you set up these settings within a given Uniform Site Configuration inside Sitecore config files. If config-based configuration is used (as opposed to the Sitecore item-based one), this is defined in sitecore/unform/siteConfigurations/deployment section and you can add the same environment variables here under <environmentVariables /> section:
<sitecore> <uniform> <siteConfigurations> <siteConfiguration name="uniform-mvc-kit"> <deployment> <deploymentService set:ref="uniform/services/hostedDeploymentService"> <ServiceUrl>http://localhost:3000</ServiceUrl> <environmentVariables hint="raw:AddEnvironmentVariable"> <variable name="AZURE_CONTAINER">$web</variable> <variable name="AZURE_STORAGE_CONNECTION_STRING">your value goes here</variable> </environmentVariables> </deploymentService> </deployment> </siteConfiguration> </siteConfigurations> </uniform> </sitecore>Step 3: Prepare the AzCopy tool#
azcopy is a standard Microsoft tool that allows to copy files from your local machine to Azure blob storage. If you haven't done it yet, you can download it from here: https://docs.microsoft.com/en-us/azure/storage/common/storage-use-azcopy-v10
Make sure to make azcopy.exe available at a path reachable from your Next.js app.
Add the
UNIFORM_PUBLISH_PROVIDER_AZUREBLOB_AZCOPY_PATHenvironment variable with the value pointing to the path of your azopy.exe file. This could be relative to the app root:.\azcopy.exeThe addition to your
.envfile could look like this:UNIFORM_PUBLISH_PROVIDER_AZUREBLOB_AZCOPY_PATH=E:\tools\azcopy.exe
Instead of defining these values in local .env file, you can always set these as system environment variables.
Step 4: Run deployment#
npm run startto kick off your app as a Build Service.Open Sitecore and trigger and republish of any page-level item under the
/sitecore/content/[SiteName]item.Your Next.js app console should show something like this:
02/00-10:24:59 info: Received deploy status request, ticket: 5, message: Generating HTML site files 02/00-10:25:00 info: Exporting has succeeded. 02/00-10:25:00 info: Creating .timestamp.txt file 02/00-10:25:00 info: Starting deployment02/00-10:25:00 info: Container '$web' created 02/00-10:25:00 info: Site was enabled. 02/00-10:25:00 info: Start uploading file to azure. container: $web, folder: C:\sitecore-jss-nextjs-starterkit\.temp\5 Exec: ".\azcopy.exe" copy "C:\sitecore-jss-nextjs-starterkit\.temp\5\*" "https://thisisjustfordemo.blob.core.windows.net/$web?st=1970-01-01T00%3A00%3A00Z&se=2021-02-22T04%3A25%3A00Z&sp=racwdl&spr=https&sv=2018-03-28&sr=c&sig=pf0L44Vq39IhMLFvfKG%2B2ukljfw29E2CQ0VU6rgR7VU%3D" --recursive --overwrite true02/00-10:25:01 info: Received deploy status request, ticket: 5, message: Uploading HTML site files 02/00-10:25:03 info: AzurePublishProvider deployed site files: C:\sitecore-jss-nextjs-starterkit\.temp\5 02/00-10:25:03 info: Successfully deployed 02/00-10:25:03 info: Deleting temp dir: C:\sitecore-jss-nextjs-starterkit\.temp\5 02/00-10:25:03 info: Temp dir was deleted: C:\sitecore-jss-nextjs-starterkit\.temp\5 02/00-10:25:03 info: Received deploy status request, ticket: 5, message: Deployment is completeOpen your site on Azure Storage static site url, it's the one looking like
https://abc.z6.web.core.windows.netThe site should render normally.
Congrats, you have deployed your app to the Azure Blob Storage, now it is fully decoupled from your Sitecore instance, which you can now shut down :)
Other things you can do#
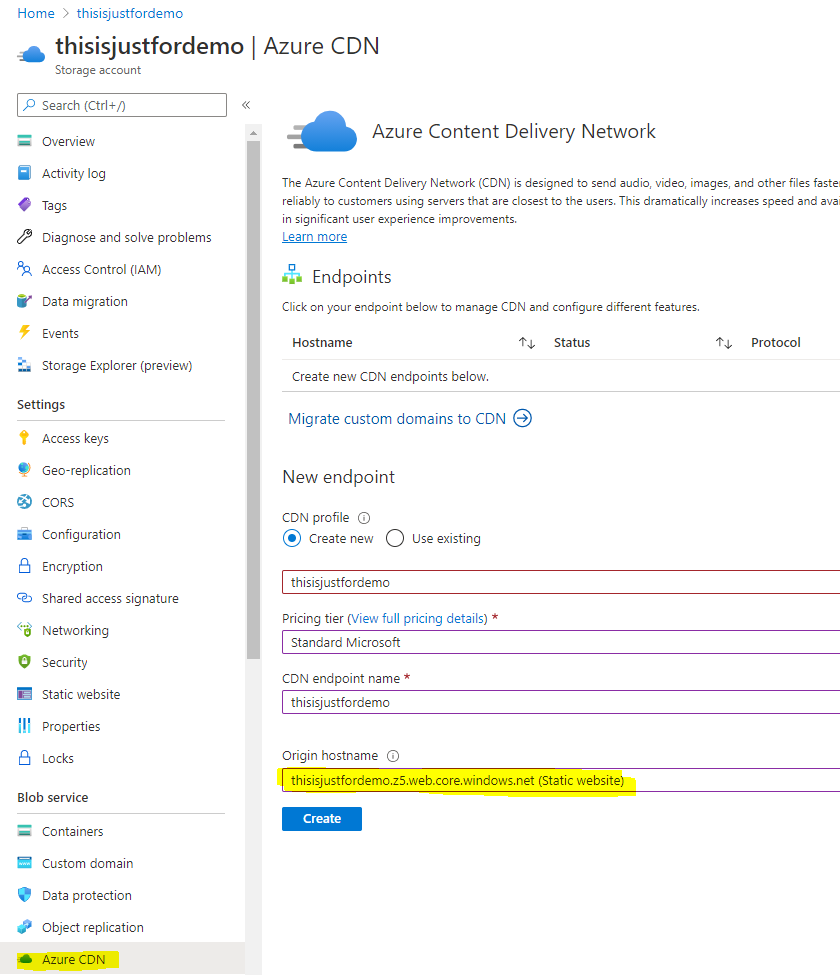
1. Add Azure CDN in front of Static website#
Having a CDN in front of Azure Blob Storage is recommended for production, as it helps with global distribution of the static assets, as well as with compression (gzip or brotli).
Thankfully, Azure makes it super easy to do in Azure Portal, simply navigate to the "Azure CDN" area and configure the endpoint.
Make sure to select "Static website" in dropdown for Origin hostname