How to migrate from MVC to React
In this How-To, we are using the same Sample MVC website as we used in our Jamstack for Sitecore MVC Tutorial.
There are several steps needed to start rewriting components in React.
Before you start#
We are going to rewrite ImageTextBlock component from the front page of the Uniform MVC sample app. First, let's save outer html from inspect element in notepad. We are going to use it later.
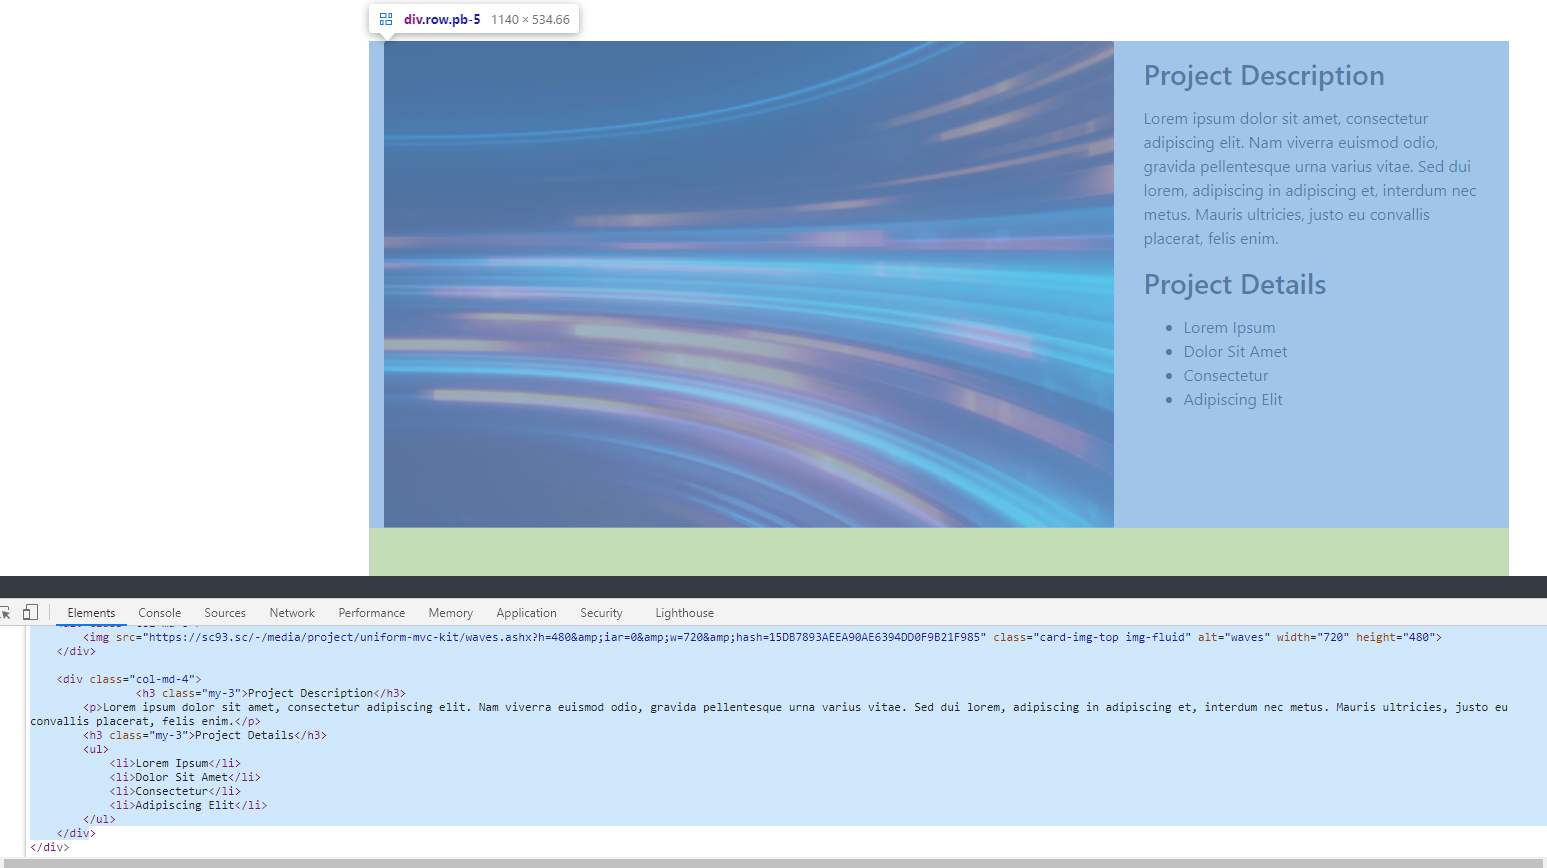
This is the html in case if you've missed this step for some reason:
<div class="row pb-5"> <div class="col-md-8"><img src="https://sc93.sc/-/media/project/uniform-mvc-kit/waves.ashx?h=480&iar=0&w=720&hash=15DB7893AEEA90AE6394DD0F9B21F985" class="card-img-top img-fluid" alt="waves" width="720" height="480"></div> <div class="col-md-4"> <h3 class="my-3">Project Description</h3> <p>Lorem ipsum dolor sit amet, consectetur adipiscing elit. Nam viverra euismod odio, gravida pellentesque urna varius vitae. Sed dui lorem, adipiscing in adipiscing et, interdum nec metus. Mauris ultricies, justo eu convallis placerat, felis enim.</p> <h3 class="my-3">Project Details</h3> <ul> <li>Lorem Ipsum</li> <li>Dolor Sit Amet</li> <li>Consectetur</li> <li>Adipiscing Elit</li> </ul> </div></div>Step 2. Create a simple component in Uniform Next.js App#
In
.envfile in the root, setUNIFORM_OPTIONS_MVC_MODE=mixedThis setting is used in Uniform Service to understand, which data to request from Sitecore for rendering. Without mixed mode, only
map.jsonandpage.jsonservices are requested. With mixed mode set, for each component we'll also requestitem.json, which allows us to rewrite components in React, and get current datasource item data throughpropsCreate
componentsfolder in the root:
In
componentsfolder, create ImageWithText.jsx file, and fill it with the next contents:export const ImageWithText = (props) => { return ( <div>I'm a new ImageWithText component!</div> )}Now we need to tell our app where the new component is. Find
pages/[[..slug]].tsxfile: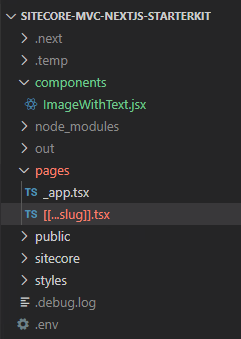
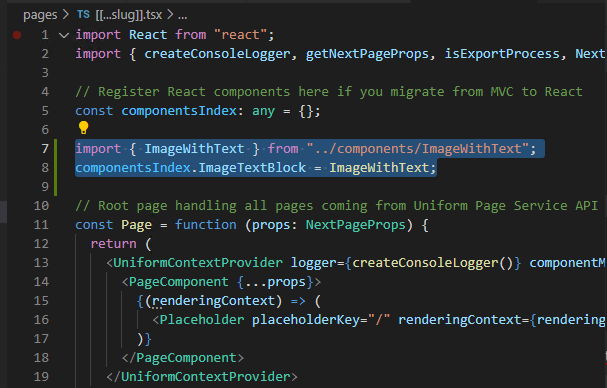
Add the next lines right after defining of componentsIndex const:
import { ImageWithText } from "../components/ImageWithText";componentsIndex.ImageTextBlock = ImageWithText;This is how your slug.tsx is going to look like now:
Now, try to run
yarn devand loadlocalhost:3000. This is what you should see:
Note that the MVC component has been replaced with our new simplistic React component.
Congrats! Now you've rewritten your MVC component in React!
Now, let's try to make this component to look exactly like MVC component we had before.
Step 3. Make the new React component look like before#
Take the html code from step 1, and run it through any html to jss converter - there are several of them available as extensions in Visual Studio Code, for example. The resulting code should look like this:
<div className="row pb-5"> <div className="col-md-8"> <img src="https://sc93.sc/-/media/project/uniform-mvc-kit/waves.ashx?h=480&iar=0&w=720&hash=15DB7893AEEA90AE6394DD0F9B21F985" className="card-img-top img-fluid" alt="waves" width={720} height={480} /> </div> <div className="col-md-4"> <h3 className="my-3">Project Description</h3> <p>Lorem ipsum dolor sit amet, consectetur adipiscing elit. Nam viverra euismod odio, gravida pellentesque urna varius vitae. Sed dui lorem, adipiscing in adipiscing et, interdum nec metus. Mauris ultricies, justo eu convallis placerat, felis enim.</p> <h3 className="my-3">Project Details</h3> <ul> <li>Lorem Ipsum</li> <li>Dolor Sit Amet</li> <li>Consectetur</li> <li>Adipiscing Elit</li> </ul> </div> </div>Replace our
<div>I'm a new ImageWithText component!</div>inImageWithText.jsxfile with this code. NowImageWithText.jsxshould look like this:export const ImageWithText = (props) => { return ( <div className="row pb-5"> <div className="col-md-8"> <img src="https://sc93.sc/-/media/project/uniform-mvc-kit/waves.ashx?h=480&iar=0&w=720&hash=15DB7893AEEA90AE6394DD0F9B21F985" className="card-img-top img-fluid" alt="waves" width={720} height={480} /> </div> <div className="col-md-4"> <h3 className="my-3">Project Description</h3> <p>Lorem ipsum dolor sit amet, consectetur adipiscing elit. Nam viverra euismod odio, gravida pellentesque urna varius vitae. Sed dui lorem, adipiscing in adipiscing et, interdum nec metus. Mauris ultricies, justo eu convallis placerat, felis enim.</p> <h3 className="my-3">Project Details</h3> <ul> <li>Lorem Ipsum</li> <li>Dolor Sit Amet</li> <li>Consectetur</li> <li>Adipiscing Elit</li> </ul> </div> </div> )}Switch over to your browser. If you are still running
yarn dev, then your content on localhost:3000 should already be replaced and our component should look exactly like when it was rendered through MVC: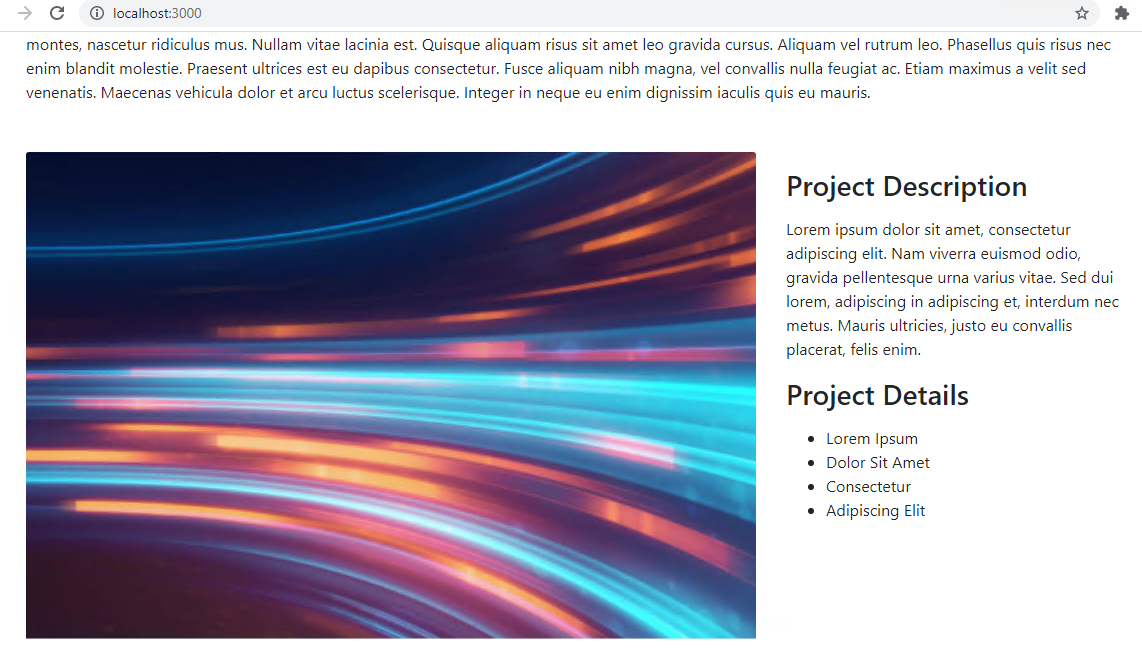
Congrats! now our new React component looks exactly like the former MVC component. We are getting closer and closer to the fully React presentation!
Step 4. Pass and use props in a new React component#
However, as you might have noticed, our new component now contains only hardcoded texts and images. How do we make it to represent Sitecore fields?
Step 4.1 Sitecore Configuration for getting rich component props#
Our new component props contain an object called renderingContext, that is being formed from page.json returned by Uniform Connector. So to tell our page.json to contain specific datasource information, needed for ImageWithText component, we need somehow to tell our Sitecore side that this particular rendering will need to pass data for it's datasources.
This can be done in two ways. For both of them we need to know our rendering id first. Maybe you already know which rendering it is - so just save its id somewhere. If you can't pinpoint the exact rendering corresponding to the part of the page you want to rewrite, you can look into page.json API output and look for the content from that place on the page:
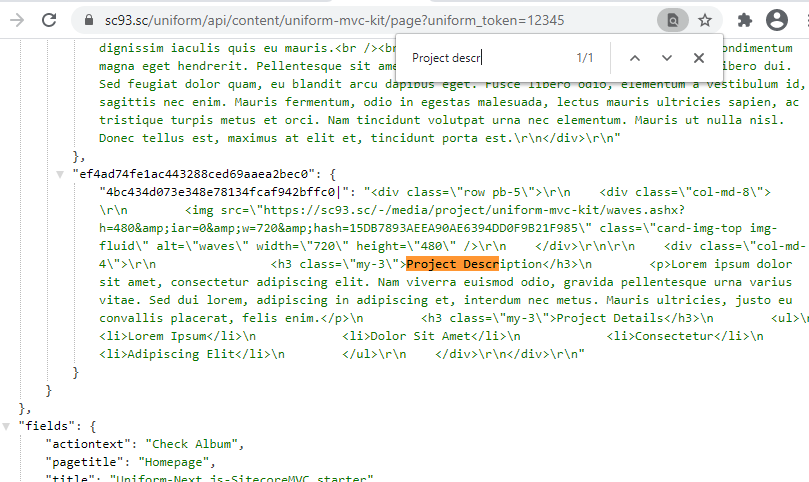
ef4ad74fe1ac443288ced69aaea2bec0 is the Id of the actual Sitecore rendering
Now, when you know ID of the rendering, either use a config setting to override it (Option 1) or change rendering's item template (Option 2). If you use a config setting, you will still be able to use MVC rendering on your Sitecore side - for example, for Experience Editor. When you change template of the rendering, you won't see this rendering in Experience Editor anymore.
Option 1. Adding a config setting#
1) Activate uniform-mvc-kit.Uniform.Deployment.ReactRenderings.config in App_Config\Include\zzz_uniform-mvc-kit by removing .disabled extension from it.
2) Instead of sampleRenderingId being overridden, add our rendering id, so that your config file now looks like this:
<configuration xmlns:patch="http://www.sitecore.net/xmlconfig/" xmlns:set="http://www.sitecore.net/xmlconfig/set/"> <sitecore> <uniform> <services> <renderingNodeService> <javaScriptRenderingOverrides> <ImageTextBlock>{EF4AD74F-E1AC-4432-88CE-D69AAEA2BEC0}</ImageTextBlock> </javaScriptRenderingOverrides> </renderingNodeService> </services> </uniform> </sitecore></configuration>Option 2. Changing template of the rendering#
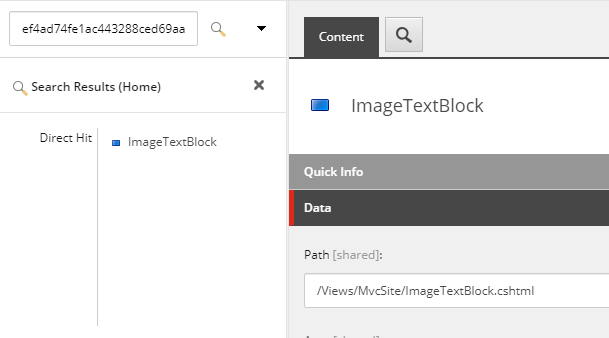
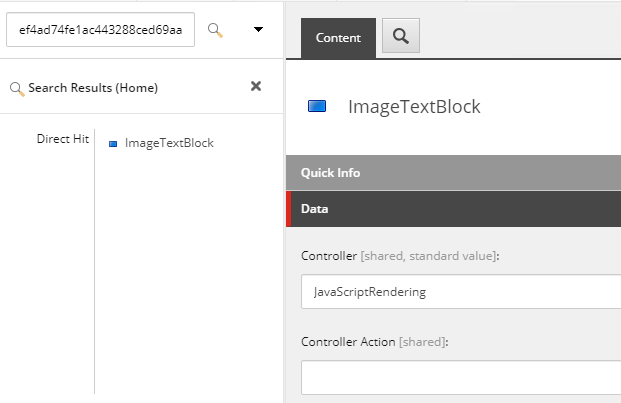
1) Find rendering definition item by rendering id in Sitecore:
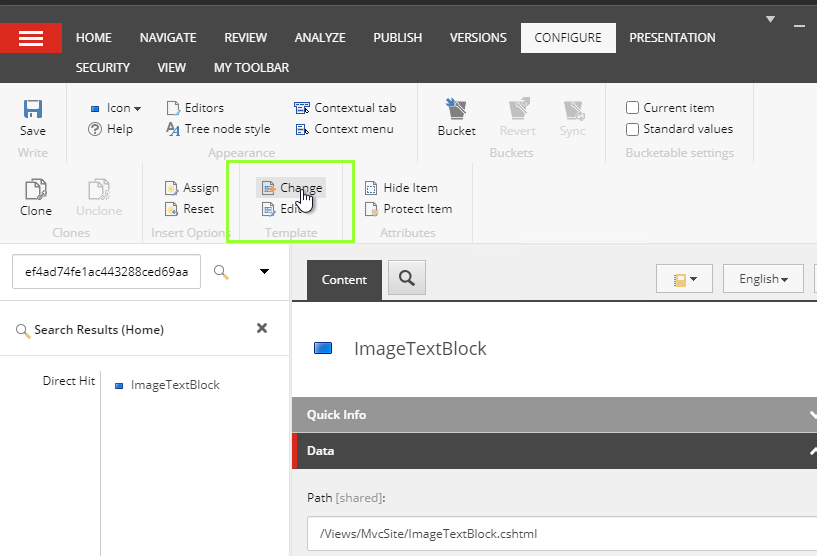
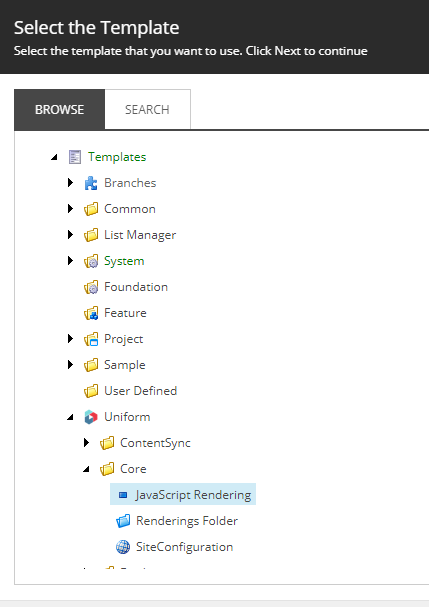
2) Change template Change template of the rendering we are planning to rewrite to Uniform Javascript Rendering:
You are going to get warning about fields that will miss after change - just ignore it.
After template change your rendering item will look like this:
Important: now you need to still have your Build service up and running with yarn start or yarn dev. We need to keep it running now, because we will need to publish this rendering item.
4) Publish rendering item.
For both options of overriding rendering, the easiest way to check if it's worked is to visit page.json again and see if you can find renderingId in the output again. If everything is configured correctly, you will NOT find ef4ad74fe1ac443288ced69aaea2bec0 on the page anymore - because it's not rendered via MVC anymore.
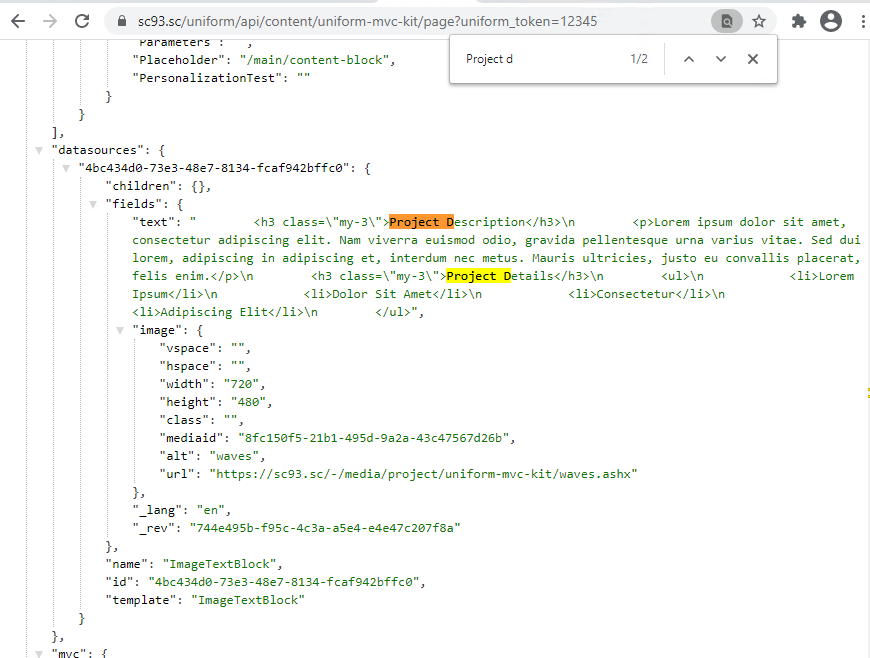
However, you'll find now that datasources part of the page.json contains the datasource for overridden rendering:
Step 4.2 Getting datasource context data in the component#
With the change above, fields from datasource item, specified for the rendering, will now be propagated to props of the component that we are rewriting. More specifically, datasource became a part of the renderingContext object in props, and can be accessed now via props.renderingContext.item.fields in that component. Let's check it!
- If you try to read
renderingContextobject frompropsinImageWithTextcomponent, you should get everything that is available on the page at the moment:
export const ImageWithText = (props) => { const { renderingContext } = props; console.log({ renderingContext });}- Check your console in browser where you have localhost:3000 running and observe the renderingContext:
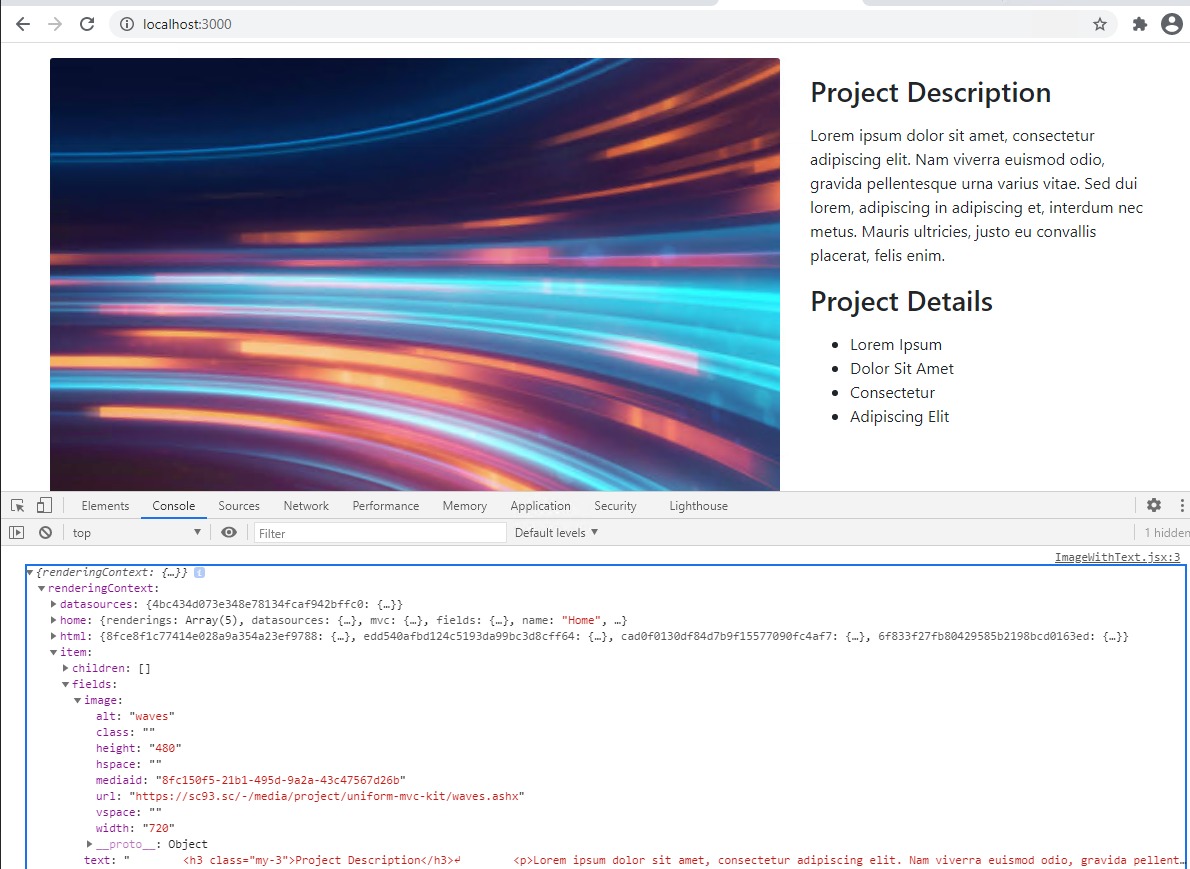
Now we can see our datasource item fields being passed as a part of props!
This is the point where our component becomes fully functional. The only thing we need to do now is to replace hardcoded parts of the ImageWithText.jsx with the data available in props:
- our image source will become
{renderingContext.item.fields.image.url} - our text will become
{renderingContext.item.fields.text}
- our image source will become
Although we need to use dangerouslySetInnerHtml for Rich Text fields, otherwise you'll get all the <h3>, <ul> and <li> tags from Rich Text as is on the page.
Here is the final code for ImageWithText:
export const ImageWithText = (props) => { const { renderingContext } = props; const { item } = renderingContext; const { fields } = item; return ( <div className="row pb-5"> <div className="col-md-8"> <img src={fields.image.url} className="card-img-top img-fluid" alt="waves" width={720} height={480} /> </div> <div className="col-md-4"> <div dangerouslySetInnerHTML={{ __html: fields.text }} /> </div> </div> )}Congrats! now you've successfully overridden MVC component with React representation, followed the same style and retrieved field values from rendering's datasource!